Isn't there something magical about starting your day with a warm cup of coffee or tea? And what if that cup carried a personal message, something to lift your spirits or remind you how amazing you are? Recently, during our #PROJECTlipstick event, each of us walked away with a personalized mug, hand-painted with words of encouragement and love. These aren’t just ordinary mugs—they’re little reminders of positivity and self-care for those days when you need a little extra boost. Whether it’s a motivational quote, a heartfelt note, or even a silly inside joke, creating your own mug is super simple and makes for such a meaningful keepsake.
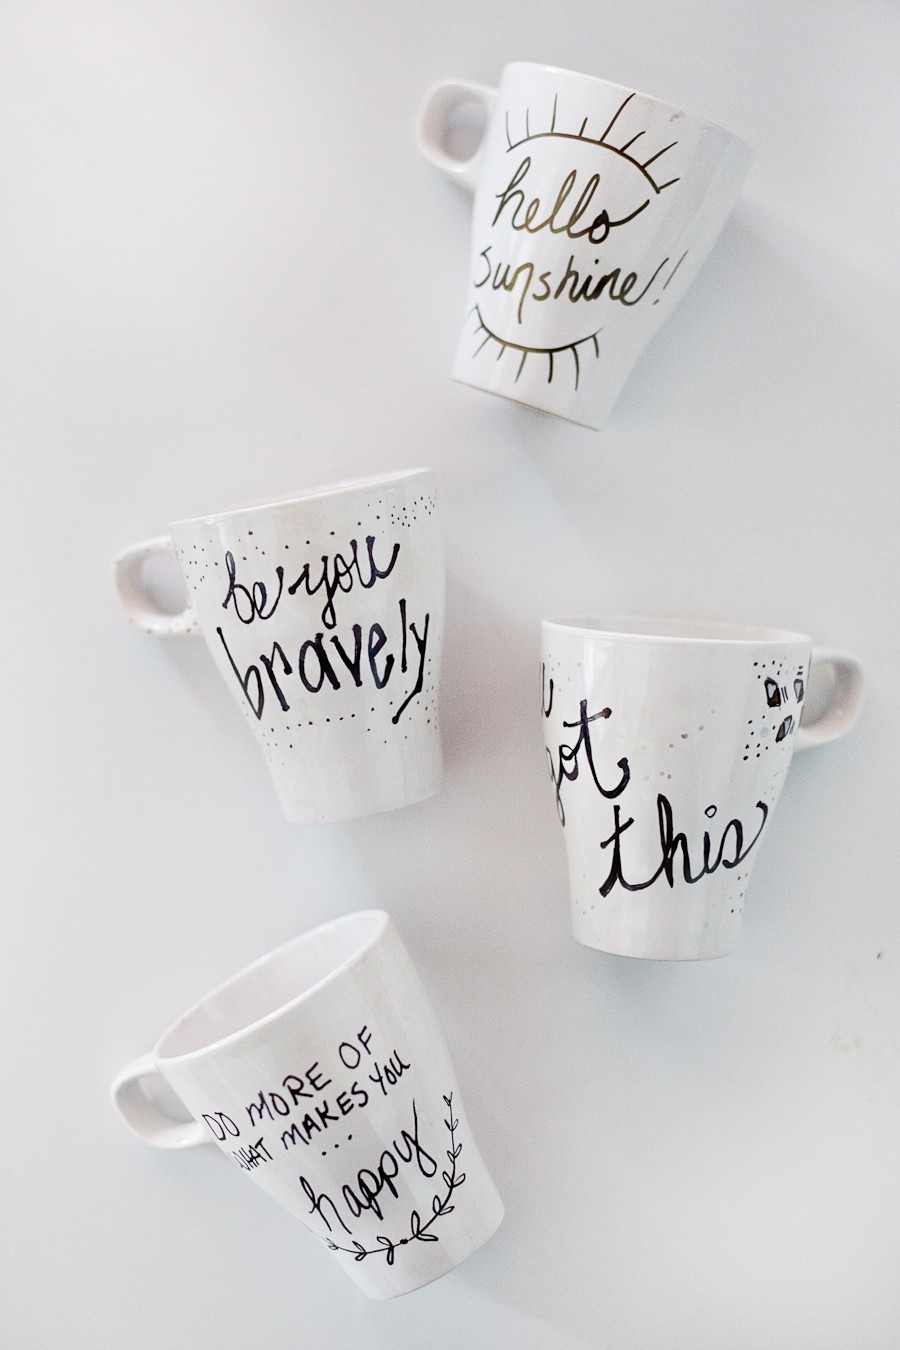
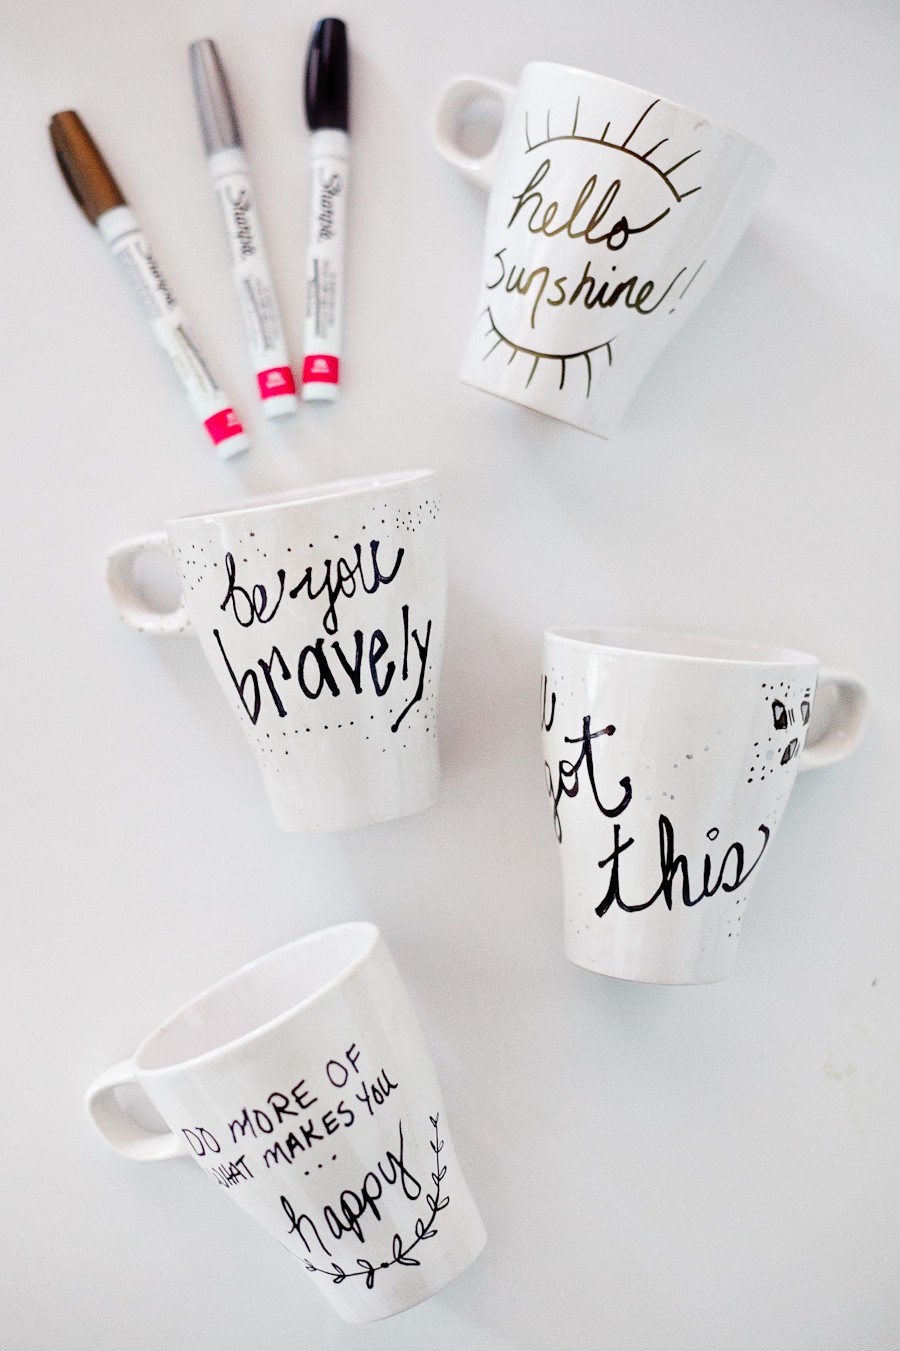
Take a look at some of the mugs we made—aren’t they adorable? 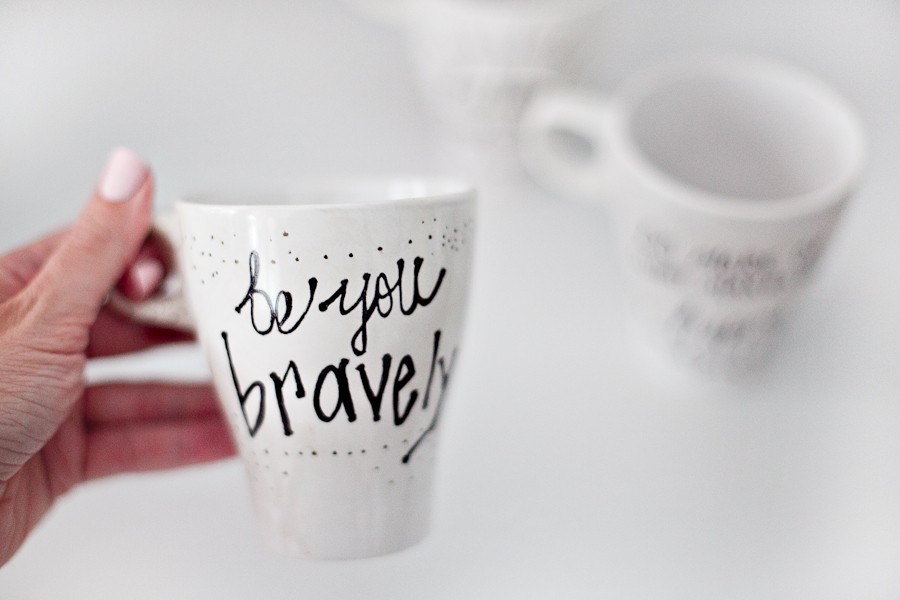
Supplies Needed:
To create your own inspiring mug, you’ll need a few basic items. We used plain white mugs from IKEA (they're affordable and work great), along with Sharpie oil-based paint pens. The pens come in a variety of colors and allow for detailed designs, making them perfect for this project.
Step-by-Step Instructions:
Start by sketching out your design or writing your message directly onto the mug using pencil lightly. Once satisfied, trace over your outline with the paint pens. Let your creativity shine—whether it’s a heartfelt note, a favorite quote, or even a doodle, this is YOUR mug, so make it uniquely yours! Some of our favorites include things like "Good vibes only," "Dream big," or even a playful reminder like "Coffee is life." Once you’ve finished painting, place your mug on a cookie sheet and slide it into a cold oven. Set the temperature to 350°F and allow it to preheat along with the oven. Bake for 30 minutes, then turn off the heat and let the mug cool completely inside the oven. This step ensures the paint adheres properly and prevents cracking later on. Be patient—it’s important to wait until the mug cools fully before handling it, as it will still be quite hot after baking.
We’d absolutely love to see what you create! Snap a photo and share it on social media using the hashtag #freshmommyblog. We can’t wait to see how your personalized mug turns out.
xo

And remember, life is too short not to enjoy every sip from a mug that speaks to your soul. Cheers to positivity, creativity, and a touch of handmade charm in your daily routine!
Citizen Blood Pressure Monitor
Blood pressure Monitor Sale,Smart Blood Pressure Monitor,Blood Pressure Monitor Upper Arm Talking,Blood Pressure Monitor Upper Arm Automatic,Blood Pressure Monitor Use
Shenzhen Urion Technology Co., Ltd. , https://www.urionhealth.com